Showing posts with label Boots. Show all posts

Thursday, 19 July 2018

Tankwa Camino – the hardest and yet most amazing thing I have done in my life.

Written by Kirsten Fourie, photos by Marlize Stander (unless otherwise stated)


How it all started...

Founder, Danie Pieterse, had a dream to one day walk from his grandfather Jan Pieterse’ s grave in the Tankwa Karoo to his other grandfather's grave in Rawsonville. Danie shared this idea with one of his friends, Charl van der Merwe and soon the idea for a similar pilgrimage arose in the form of the Tankwa Camino. The main idea behind the Camino was to introduce people to this beautiful part of our country that connects Calvinia (in the Northern Cape) with Ceres (in the Western Cape) through the Tankwa Karoo. Danie and his wife Rhina are now managing this event along with a number of other routes centred around the town of Calvinia.


Photo crdit: https://www.facebook.com/tankwacamino/

The Route

The Tankwa Camino route follows the R354 between the towns of Calvinia and Ceres. I think it is the nothingness of this world that makes it so enchanting.  Our group was about 60 walkers and yet because of varying starting times and hiking speeds there were many, many, many hours when we walked alone and as far as the eye could see – it was only us!  When you drive this road – your thought is wow it is so flat – but just wait till you walk it.  There are a few hills waiting to surprise you along the way.  Fortunately, there is a vehicle that provides water, no need to carry extra water.  The rest of our luggage and tent was transported daily on the Camino lorry to the next camp site.  In my thoughts, even now a few years later, it is the silence and wide open spaces that call me back.


The food

So how does the food work?  Breakfast and lunch comes out of your own black crate.  I am not such a fast walker so Louis and I carried lunch and enjoyed it along the way.  Imaging walking 25km in the middle of no-where and as you walk into camp you get the distinct smell of skuinskoek wafting to meet you.  I think for many hikers Truida’s tea time treats where the biggest hit.  You just can’t imagine what she conjures up on the plains of the Tankwa Karoo.  Each evening we were treated to a hearty potjie / braai cooked with lots of love.


Bang for your buck

Walking the Tankwa camino was a privilege for which we saved but we were not disappointed.  A few things have changed since we walked and so according to the website this is what is included for the fee.
  • Meet-and-greet dinner on the evening before the event (6 pm at Calvinia Moederkerk hall)
  • Transport of your belongings along the route
  • Support vehicles and team that travel with hikers
  • Coffee/tea/milk/sugar in the early morning and after dinner
  • Daily fruit of the season
  • Snacks upon arrival at base camp each day (Boere high tea)
  • Dinner daily of potjiekos or braai, pot bread with kaiings/dripping (if available), syrup & homemade jams
  • Hot water will be available on arrival at each overnight camp for washing purposes.  You collect your own water out of the heating pots but are limited to 5 litres per day.  No showers allowed.
  • Daily drinking water allowance
  • Closing ceremony with light lunch & drinks at Ceres Museum (http://www.ceresmuseum.co.za)
  • Tankwa Camino T-shirt
  • Tankwa Camino certificate


My Story


I walked the Tankwa Camino a few years ago.  My youngest was about 4 and the oldest 6 and half.    Life gets a bit blurry with two little people in your life.  As a women, I think I momentarily forgot who I was.  I always said if you  want to know if you can marry someone you should do at least a 5 day hike before you get married because then all the character traits will be exposed.  Well my husband swept me off my feet and walked me down the aisle before a hike and then life happened.  Marriage is hard work at the best of times but during those early years of children communication is often challenging.  I needed to be just me again (just for a few days) and I needed to connect with my husband...so we decided to do the Tankwa 
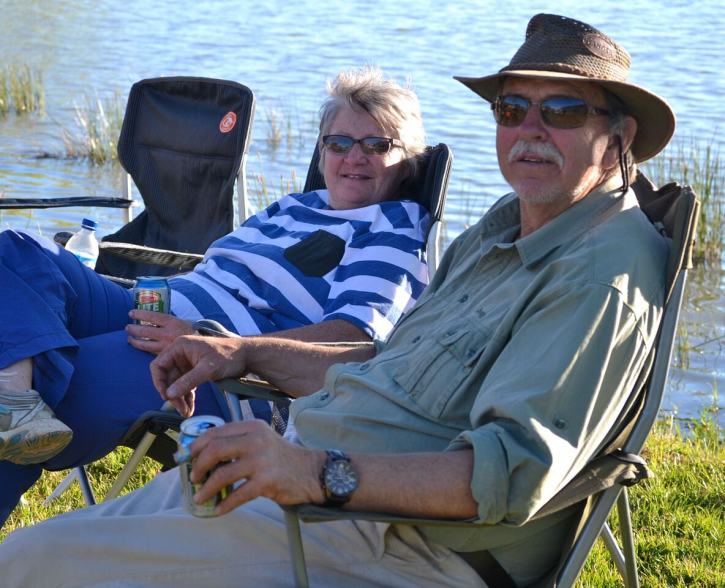
Camino... and we made it! This photo was taken on day 8 after about 200km.


Photo credit: Louis Fourie


How fit do you have to be?

I am not a fitness bunny, in fact if anything I am just the opposite and overweight and, so walking the approximately 25km a day was very hard for me. After the first day, I decided I was not going to walk 25km anymore!  I was only going to walk 5km ... and that is what I did.  Danie and his team placed markers along the way approximately 5km apart (mainly to warn motorists of walkers ahead) so all I had to do was make it to the next marker.  After that head shift I was good to go – well my mind was but my body protested every day at about the 20km mark.  At that point, to save my marriage – I would put my ipod on and say to my husband, “don’t speak to me...” and then I would put one foot in front of the other and just push on for camp.  Now, don’t get me wrong – you have to be fit to do this Camino.  The distance is far, the road is hard and the sun bakes down in those Tankwa plains.  The gravel road surface has – like everything in life - its pros and cons.  The positive of walking on the road is you don’t have to have strong climbing legs. If you are walking fit you can make the Tankwa Camino.  So, in my opinion ... for this walk it is your head that will earn you bragging rights – that is, if blisters on your feet don’t beat you.


There is so much more...

Since starting the Tankwa Camion Danie and Rhina have added a number of routes.  Choose a route according to your fitness, time available and budget.   Each route has its own personality and charm and will open up the beauty of this world I call home.  The names to look out for include, Roggeveld Enduro, Sterrewag enduro and Hantam enduro.

Check out the following links for lots more stories and information.


Thursday, 22 October 2015

Entabeni Hiking Trail - Limpopo

WHERE?Start at Entabeni Hut, 40 km east of Louis Trichardt, Soutpansberg
WHEN?Booking is essential.
HOW?Call Komatiland Forestry on 013-754-2724
HOW MUCH?Price on request
OVERNIGHT?Stay at accommodation in Louis Trichardt, in Limpopo


Start:         Entabeni Hut, 40 km east of Louis Trichardt in the Soutpansberg
Finish:      Entabeni Hut
Duration:  2 days, 32 km
Fitness:    Moderate to difficult 

Our tip: bring your own water particularly during the dry season; hikers are advised not to drink from the streams
This overnight, figure-eight hiking trail starts and ends each day at Entabeni Hut. Each trail is roughly 16 km and there are shorter loop options (within these loops) that vary between 8 and 12km. You can decide whilst hiking whether or not to take these.
For those hikers who have traversed the southern Soutpansberg for years these trails, re-established by Komatiland Forestry, replace former well known trails. The overnight hiking hut, despite having the same name, is not the old Ou Entabeni hut.
Highlights of the trail include: Klein Australia Peak, Ebbe Dam, Vera's Peak, Vera's Tears waterfall and the funghi and incredible indigenous forests.

The Redwood Trail heads south of the hut through pine plantations and indigenous forest filled with huge redwoods and if you are quiet the calls and rustles of samango monkeys. You can take this trail a lot slower than the Phadzima View Trail. It is easier, and Vera's Tears waterfall adds a great stopping spot for hot days. The longer loop continues south up to Klein Australia View with views of the Levubu tropical farms.

The Phadzima View Trail heads north of the hut passing through incredible indigenous forest via the Ebbe dam. Views out over the Phadzima valley are said to be worth it, and some of the biggest tree ferns imaginable make the trail seem otherworldly. A loop up to the Thate-Vondo view and Mathiva Peak is optional. It adds an extra three odd hours, for those intent on the longer version of the hike.

Saturday, 17 October 2015

Diepdrift Hiking Trails-Limpopo


This is a 4000 hectare game farm outside Bela Bela in the Waterberg in Limpopo. There are 2 overnight hikes and 2 day trails on this farm. Diepdrift Farm has hikes for the experienced and those just looking for an awesome stroll through nature. They have many species of antelope and bushveld trees on the reserve.

The Hippo Hiking Trail is a 24km trail over 2 days. It heads through the bushveld leading to a hippo pool where it is suggested not to swim because crocodiles are spotted there on a regular basis. Other game will also be spotted on this route. It is a circular trail. Be exceptionally careful at the pool because of the hippo’s and crocodiles.

The Sable Hiking Trail is also a 24km, 2 day trail. It is a tough trail with steep climbs and descents which cross the Diepdrift and Elandsfontain farms. You will definitely spot some game while you cross the mountain range and walk into a kloof. Then you are rewarded at the top of the plateau with spectacular and breath taking views of the bushveld landscape.

There are two shorter trails, the Bontebok Hiking Trail which is 4km, about 2 hours. It is a circular hike through the hills which is best done in the late afternoon or early evening. Then the Klipspringer Hiking Trail which is 8km and 4hours. This is another circular trail which explores the unusual erosion on the farm with stunning rock formations. There is plenty of game to be spotted.


Contact Anvie Ventures +27(0)12 662-0586

Thursday, 15 October 2015

Hydration is Key

You must not even think of starting a hike that will take you more than 2 km from home without a bottle of water. You should have at least one litre of water with you and drink about 250ml every 40 minutes. You should keep drinking water even if you don’t feel very thirsty. You might not realize it but while you are hiking, your body does lose moisture. So its very important to replenish it. 


 A good way to tell if you are hydrated is that you should have consumed the entire litre of water during a 3 hour hike and still need to use the loo afterwards. If that is not the case you should drink more water since it means you have lost more moisture from perspiration than you have replenished. Drink water every now and then until you need the loo.

Water is the key to survival, doesn’t matter if you are at home or on a hike. You can live for 3 days without water and I can tell you from experience after 1 day without water you are not acting rationally.

If you don’t have food you will be able to walk on for about 200 km. But if you run out of water, you have one day to find a way out of that situation, after that its up to…

Friday, 10 April 2015

Hiking Gear Part 7 Hiking Gear

Things to Consider When Planning a Hike

Think about the environment where you will be hiking, the altitude, the terrain and the weather. Hot arid areas like the Northwest Province and Karoo would need more water and less insect repellent. Where as the more humid areas like the eastern parts of South Africa would need more protection against insects such as mosquito’s and malaria.

When buying equipment for your hike only get what you need, not more. If your hike will be done on a well maintained trail then you won’t need things like “Gaiters” for example. If you will be going through rough bush then that would be a wise purchase to protect your legs.


Essential Gear

Backpack (size dependant on how long your hike will be)
Good sleeping bag. (Always wrap in a black bag to keep it dry)
Water
Water-purification tablets (if no clean water is available on the trail)
Food
Lighter or matches. (make sure to keep them dry in a zip lock bag)
First-aid kit
Knife
Sunscreen
Sunglasses
Whistle
Insect repellent
Compass
Map
Hiking boots

NB! All clothes not being worn should be wrapped in garbage bags to keep them dry (there is no such thing as a waterproof backpack!)

Hiking socks
Fleece jacket
Underwear (shirts & pans)
Wide-brimmed hat
Short pans
Long pans (I wear those long pans which can convert to short pans)
Long sleeve shirt
Short sleeve shirt
Hooded rain suit
Gloves (depending on the season)
Small towel

ID
Money
Small gas stove
Spare gas cylinder
Cooking pots (I use dixies)
Knife, fork, spoon and mug.
Headlamp or torch (spare batteries)
Water Bottles
10m long nylon rope
Black bags
Zip-lock bags
Watch
Pencil and paper
Toilet paper in plastic bag to keep dry.


Tuesday, 6 January 2015

Hiking Guide Part 6 Maps

The Importance of Maps

Most experienced hikers rely on maps to navigate along hiking trails and through wilderness areas. Actually, it's the more experienced hikers who tend to do this and the beginners who think they don’t need maps.
Beginners will often think that they can stick to well-travelled trails and forego the hard work needed to learn how to use maps.

You really can get seriously lost, even near clearly marked trails. Stepping a few yards off a trail into heavy forest has confused more than one beginner. In the absence of sun, stars or geographical markers it's easy to get turned around. You can end up walking even farther from the trail. Then when you look again, you're lost.

Many hiking maps won't necessarily help you out of that forest. But you'll usually come across another trail that, which hooks up with the one you were on. A good hiking trail map will help you easily get back to your starting point.

So, how do you start?
When you start hiking, I advise you get into this habit from the get go. Find a current map covering the area you intend to hike. Study it at home in a relaxed environment. You won't be able to match the map against features you see, but it will help you understand the symbols used. Google maps is an amazing tool to use with the map you have to get to know the area you are going to hike.


Almost all maps will have a legend. Get familiar with the symbols, this is very important. They differ from map publisher to publisher. Find out what the scale is - look for 1 cm = 1km or similar markings.


Don't forget, that distance is only part of the story. One km on level ground is one thing. But if 3/4 of that distance takes you from near sea level to 600 meters high by a steep, winding incline, that's quite another.
You need to consider altitude. Altitude markings are usually indicated by a series of curved lines that. The distance between two curved lines around some natural feature like a large hill indicates altitude. Often there will also be numbers printed along the lines to help you. These are sometimes called contour lines. The closer the lines are together, the steeper the terrain.


Now look at the longitude and latitude lines. Longitude runs 'up and down', or north and south. Latitude runs 'right and left', or east and west. Those directions are put in quotes because they're all just conventions.
In the daytime you can use the sun and natural features to keep direction. The sun rises in the East and sets in the West. So early in the day, find the sun and you are facing mostly East. Late in the day, face the direction of the light and you are facing predominately West. There are variations because of coastlines, latitude, etc. It's just an approximate starting point.


At night, you can use the stars. You can often see the sky reasonably well - most wilderness areas are relatively far from city lights. This link from Getaway magazine will help you with that. http://www.getaway.co.za/travel-ideas/things-to-do/how-to-navigate-using-the-stars/

Even at night, then, if you have a flashlight to read your map by, you can get yourself back onto a trail to find your way back.

Monday, 15 December 2014

Hiking Guide Part 5 Backpacks

Hiking Backpacks

All about Backpacks

On a hike, everything you need and want, you will have to carry. So if you feel it necessary to bring along that 6 pack of beer, bottle of wine, huge camera, tripod and the kitchen sink, remember you must carry it all the time. It is always good to keep in mind that you want to be as comfortable as possible.

There are so many hiking backpacks on the market today. They come in all sizes and colours, in a range of materials and with enough add-on extras to satisfy the most demanding hiker. I have found three sizes work well for me and this depends on the length of the hike, size of the group, weather and extra stuff (gear) for activities on the hike. After considering all of that, choose the smallest pack required.

·        Moon Bag / Waist Bag / Fanny Pack
These small packs are normally used to carry personal belongings on day hikes. These bags are normally carried in the small of your back, but most of us turn them to the front so that our belongings are easily accessible. Most of these are categorized by size (volume typically), measured in litres. But remember it refers to space, not necessarily the amount of liquid something holds. Be careful not to overload this bag, it could start bouncing around while walking and be very uncomfortable. For short hikes, they can do just fine. Then you should rather move up to the larger day hiking bag.


·        Day Hiking Bag
This bag only has shoulder straps and no waste strap. It carry’s more, so be careful not to overload this bag. It does not have a waste strap and can put strain on your shoulders. They are anywhere from 12 to 36 litres in volume and come in a variety of styles. Some have a chest strap to keep the backpack stable. Daypacks are designed for what the name suggests - to be used for relatively short hikes.


·        Back Pack
For a day hike you should not use a hiking backpack unless you are gearing up for cold weather, going a very long distance or helping others with carrying gear. These backpacks are from 35 to 70 litres in volume. If you use these packs correctly, you can carry quite a lot of gear. If you are training for a long hike it is good to carry this pack, fully loaded. Always remember YOU must carry this bag. You do get expedition type backpacks which hold over 70 litres of gear. These heavy-duty backpacks have all kinds of lumbar support, pads, special materials and well-engineered balance mechanisms. Many have special holders for sleeping bags, or even a small fold-up tent. They come in ultra-sturdy composite materials and are just about indestructible. Take time during your hike to adjust your pack to keep things balanced. An off-centre strap or pack, something hard pushing into your back can turn your hike into a nightmare very quickly.


Whichever pack you decide to use at the time, always make sure you keep the contents safe from the rain. Your Moon bag can fit under your rain coat and you get special plastic rain covers for the day hiking pack and the hiking back pack.

Remember! You are not trying to make a fashion statement, always make sure your packs fit you well and are comfortable.

Saturday, 13 December 2014

Hiking Guide Part 4 Socks

Hiking Socks 

Selecting Hiking Socks

Hiking socks aren’t just another gimmick to get your money. You wouldn't think so, but selecting socks is even harder than buying boots. There are so many good models and manufacturers of good boots. If you find ones that are sturdy and fit well, you'll probably be pleased. But, socks? That's tough.
Wearing good quality socks while hiking will make your hike a much better experience and are an important part of your gear.

Sports socks are not hiking socks. You don't want to wear the same socks you use to play tennis or soccer when you set out on a long hike.

The goal of hiking socks:
  • Cushioning your feet to make your hike more enjoyable.
  • Wicking (absorbing) moisture from your feet to help prevent blisters.
  • Keeping your feet warm while hiking in winter and the opposite.
  • Reduce blister causing friction
  • To a small degree, improving boot fit.


You need good socks.
You'll put about 1600km on a pair of hiking socks before they're ready for the garbage can. That sounds like a very long distance. But consider that it is really only about a year if you take modest hikes every weekend.
For those 1600km you want comfort. The word has the ring of luxury about it, but in hiking comfort is essential. Blisters, chafing and other foot damage can turn a 6km hike back to the trail head into torture if your socks fail you.
Good moisture-wicking is mandatory. 'Wicking' means taking the sweat produced by your sweat glands off the surface and transporting it away from the foot. If the sock fails to do that, you'll develop fungi, blisters, chafing, and other ugly results.

Choosing good socks:
  • Never use cotton socks for hiking. Cotton absorbs moisture and take forever to dry.
  • Use wool to stay warm and still wick away moisture. They tend to be the most expensive. Look for Merino Wool, softer and finer fibres.
  • Use synthetics if your feet sweet a lot because they wick away moisture better than natural fibres.
  • Turn the sock inside out and check the denseness of the fabric loops. Smaller, denser loops will work better for cushioning and absorption.
  • Thicker socks tend to wear longer. Thicker socks in the morning and thinner socks after lunch when your feet have swelled a little would be something to consider.
  • Seams on the socks should be flat so as not create more pressure points on the feet. Make sure they don't have any ridges, especially near the toes or at the anklebone. Those can irritate as quick as a pebble in your boot.
  • Socks should have elastic stretch to stop them from sinking down into a bundle inside your boot. Even the best hiking socks will lose elasticity at the top and sometimes folding them down over the top of the boot is the only way to get them to not slide inside when you're on the trail.
  • The fit must be snug but not tight. Any bagginess between the heel and toe means its to big.

If you spend even a moderate amount of time hiking you'll need good thermal properties from your socks. In hot summer heat the sock has to allow good conduction of that heat away from the foot where it can migrate out of the boot. In cold temperatures, feet need be kept within a comfortable range.
That socks can actually perform these two contrary goals is something of a technological wonder. Yet they do. That they do that while providing support, comfort and moisture-wicking is little short of astonishing. I’m sure most of you never thought socks were so amazing.

They should have thick areas on the toe, ankle bone and heel because these are the parts that get the most wear. They should be long enough to come well above the top of the boot and fold down.

Hiking socks are more expensive than other types ($10 per pair or more),
You should have several pairs to choose from, feet change size at various times of the day or year. You'll also want a variety for different climates and for style. And, of course, your favorites will always be in the laundry. Buy three of those!

Caring for your socks:
Hiking socks aren’t cheap, and you don't want to have to replace them every month or two.

·        Wash your socks inside out, so that skin particles, salt and sweat are washed out.
·        Use a small amount of fabric softner in the wash cycle to keep your socks soft.
·        Air-dry your socks for a fresher feel and a safer dry.
·        Commercial dryers are too hot and can shrink or ruin your socks. Safer to air-dry.

·        Only use them for hiking, not everyday use.

Friday, 12 December 2014

Hiking Guide Part 3 Boots

The Importance of Hiking Boots

Buying Hiking Boots

One of the most important investments a hiker will ever make is in the selection of hiking boots, especially good hiking boots. When going on a hike, one of the worst problems to have (except an accident of course) can be the wrong hiking boots.
Good hiking boots give you the support, comfort and traction you need to take part in any hike. A long hike puts enormous stress on your feet and ankles. That stress is pushed upward to the legs and has an effect on your back and entire body.
It’s not just a matter of whether you get a blister. You need a solid base. Therefore, foot support is paramount. A good boot provides the added stiffness and 'springiness', which your feet and ankles require. You want to be able to push off the ground, rocks and other surfaces in a steadfast way. You need to have confidence that your boots will support you. Without it, sore feet or even twisted ankles are almost guaranteed.
Many specialized materials are used in all modern boots, but leather is still a big component of good hiking boots. It's tough, water-resistant (when treated) and has good stiffness, moisture and thermal properties.
The word 'comfort' has the ring of luxury about it. But, in hiking, comfort isn't a luxury, it's essential. You need to continue walking without producing blisters or chafing. You need to be able to spend long hours in your boots without moisture build-up or excessive heat or cold.


Get hiking boots that feel right for your foot. Size is only the starting point. You need to spend the time and money to get something that feels good the minute you put them on. Though boots, like shoes, will wear in, if they don't feel right immediately they rarely will later.
Keep in mind that good hiking boots are not shoes. You should expect them to feel stiff and give little on the outer sole and around the ankle. That's part of how they do what they are designed to do.
You'll be climbing over wet rocks, slippery gravel, loose hills and muddy trails. While no boot can eliminate all problems, boots do differ in their ability to help. Well-designed hiking boots will have a variety of materials and geometries that minimize slipping on wet rocks and maximize sticking power on loose hill grades.

Hiking Boot Weight
The lighter your boots, the easier your walking will be. It is generally agreed that 500g extra footwear weight can be compared to 2.2kg of added backpack weight. Hiking Boot manufacturers are constantly working on creating lighter Hiking Boots while maintaining the support and other features needed.

Water Resistance
Moisture is one of your biggest enemies when it comes to Hiking. Moisture causes blisters. There are a couple of things that can improve the chances of keeping your feet dry. Look for breathable and watertight materials that will allow moisture to leave the inner parts of your boots but will not let water enter. Look for fully gusseted tongues that cover the openings of your uppers. Wet boots lead to foot problems.

Other factors depend on what kind of hiking you plan to do. If you get serious, you'll almost certainly have more than one pair. That's ok, good hiking boots will last for years. Even at R1000 – R2000 or more per pair, you're getting a good deal. Think of how much you spend on shoes in two to five years. If you hike over rough terrain you'll probably want something relatively high laced. You want to get support above your ankle. How much higher depends on your style, but make sure you get plenty of support. Always test your boots using socks that closely match what you will use. Thick, moisture absorbing, cotton or blend are perfect. You can't tell what the results will be if you try them on with casual or even sports socks. There are dozens of manufacturers and they all have good and less good products. Shop around and read online reviews. They're often written by people who have tried many over many years. furthermore look out for any good hiking boot sales near you or online.

Below are some links.
Cape Union Mart for men
Cape Union Mart for Women
Sportsmans Warehouse for Men
Sportsmans Warehouse for Women
Gordon Footwear
Outdoor Warehouse for Men
Outdoor Warehouse for Women